Thought I’d jump right in and make a quick post. Tonight was the first evening this season that I’ve spent in the garden. I really enjoyed breaking up the clumps of dirt with my hands. I was amazed that this little activity could be so therapeutic. As the clumps of dirt broke down, I sifted through the clumps in my mind that needed breaking down. After a few hours, I felt so peaceful. Gardening is wonderful medicine for our soul. Give it a try.
Archive for the ‘Gardening’ Category
Clumps of Dirt
Posted in Gardening, Inspirational, Uncategorized, tagged Gardening, Life, Simplicity on May 28, 2014|
Outdoor Quiet Area
Posted in DIY, Gardening, The Home, Uncategorized, tagged Life, meditation, outdoor, patio, Simplify on August 14, 2013|
When we replaced our 12′ by 32 ‘ deck last year I was so happy to set up this hidden sitting spot. In the morning, we love to sit out here to: have breakfast; read; and enjoy the sounds and scents of nature. Sometimes I practise meditation here. An outdoor area is so easy to set up. I previously had the bistro table, bought the umbrella at a garage sale (5.00) and picked up the mat on sale (20.00). The plants are on stands with rollers so I can wheel them around. Bamboo blinds are good for creating privacy also. I use them in another sitting area on our property. Because this area is not permanent, we take it down before the snow arrives. I hope you give this a try if you aren’t enjoying your outdoor space.
Fall Gardening
Posted in Gardening, Uncategorized, tagged annual, Autumn, fall, garden, Gardening, Journal, perennial, seed, transplant on October 4, 2011|
One of the things I best like about Fall is planning next years garden. I’ve been wandering around my garden and accessing my plants. I’ve noted, in my gardening journal, which plants did well and which ones didn’t. I’m deciding which plants need thinning and which ones need to be moved. I’m thinking about options for the plants that struggled. I’m imagining what seeds I can use in borders and where to place my pots. In the next few weeks, I’m going to trim the perennials and transplant the ones that are going to a new location. I’m going to dig up the bulbs; clean them off; and replant some of them. I’ll draw diagrams in my journal – so that I’ll know what’s where come Spring and Summer. Ladies, plan now for next year’s garden. You’ll be really pleased with the results. Have a wonderful Fall. Linda
Composting
Posted in Gardening, Reduce, Reuse, Recycle, Uncategorized, tagged chemical free, compost, composting, fertilizer, garden, Gardening, lawn, recycle, weeds on June 25, 2011| 2 Comments »
(Before and after – 8 month time duration )
I sure like to compost and have been doing so for quite sometime now. Composting creates a rich, black soil through the decay of plant and waste materials. This organic material makes a fine humus. Once you add it to your lawn and gardens, it helps break up heavy clay soils; adds essential nutrients to the soil; helps soil hold water better; discourages weeds; helps gardens and lawns become less dependent on chemicals. Composting will cut the amount of your weekly garbage almost in half – so it’s a great way to recycle. One of my favorite benefits of composting is weed elimination. I have no weeds in my established gardens. Composting is so simple, it needn’t be complicated at all. Long ago our composter was made of old wooden pallets. It was the best composter we had. We upgraded (?) to a manufactured model that looks a little better in the yard. We add things like coffee grounds, tea bags, raw fruit and vegetable scraps, mulched leaves, grass clippings, newspaper, egg shells and dryer lint. Don’t add things like meat, bones, and animal dropping. Add a little water now and then and give it a stir to accelerate the process. By the way, natural activators are coffee grounds, tea leaves, and bone meal. There are so many resources available to get you started. You might want to check your city/municipality website. Don’t let the articles complicate things for you though. It is very simple – just stick to the basics. If you’ve not started composting, I sure hope you give it a try.
Mulch Your Perennials Before Winter
Posted in Gardening, Helpful Hints & Tips, The Home, Uncategorized, tagged Canada, Gardening, leaves, mulch, perennial, Plants, winter, winterize on October 23, 2010|
Yesterday I sat out on my swing with a cup of tea to enjoy the beautiful fall afternoon. Before I knew it, I was putting mulch around my recently trimmed perennials. Its best to add mulch after the ground freezes or the first frost. Sometimes I do it when it’s most convenient for me though. This fall I am using shredded dry leaves and cut grass to keep the soil a consistent temperature over the winter and prevent my plants from dying. I usually use compost, but I’ve used all the compost in a new flower bed. To mulch the plants, I applied about a 2” layer of shredded leaves and grass around the base of each plant. I then used my gardening tool and worked it into the soil a little – mostly to prevent it from blowing away. By spring, the combination will have decomposed and my plants will look great. If theres any mulch left, I’ll simply rake it off. If you like to flower garden and live in a colder climate, you’ll find winter mulching really beneficial. Have a nice day. Linda
Beautify Your Yard and Your Neighborhood
Posted in Gardening, Money - Saving & Using, The Home, Uncategorized, tagged beautify, exchange, garden, Gardening, neighborhood, perennial, seeds on October 9, 2010| 1 Comment »
As I was cleaning out my garden the other day, I was reminded of a perennial exchange I had with girlfriends last fall. After we divided our plants and bulbs, we got together and exchanged the extras. This is a great way to beautify your yard and your neighborhood – for free. Maybe this is something you’d like to do, it’s alot of fun.
This year I’ve collected a few seeds from plants like this Painted Daisy. I’m going to enclose the seeds in cards I send to friends – as a little surprise. Have a wonderful day, Linda
Flower Cards
Posted in DIY, Gardening, Uncategorized, tagged card, Convenient, flower, handmade, photo on September 17, 2010| 1 Comment »
Ladies, if you are interested in flower gardening, you may like this idea. When your flowers are looking their best, take pictures. Print the photo and glue it to a blank note card (available at craft stores). Now you have a lovely card. I use my cards for all occasions. Have a nice day. Linda
By the way, I also use landscape photos on my cards. Fall photos look great too.
Garden Stones
Posted in DIY, Gardening, Uncategorized, tagged Gardening, mosaic, ornament, stepping, stones on June 12, 2010|
(The main glass in this stone came from a few porcelain saucers that I picked up at the thrift store)
A couple years ago I made my first garden stone. It really is fun and adds a nice touch to the garden. Recently, had a few friends over and we each made one while we caught up on each others lives. I hope you give this a try.
Supplies
– Mold/form – plastic container or a tin baking pan. Shapes that are rectangular, heart, round will work well. It needs to be at least 2 ” deep.
– A coloring page sheet (this is your template) It must fit into your form – unless you would prefer to work free hand
– Clear plastic shelf liner
– Mortar mix – mostly sand and no gravel (about 7.00 for 22 kg)
– Broken Glass, stones, marbles, beads, broken tile, potter, china
– Petroleum Jelly
Instructions –
Place clear sticky shelf liner over a coloring book page – sticky side up. Tape both in place on a work surface, like a table. Lay colored glass on the sticky paper – using coloring pattern as your template. Remember, you are seeing the reverse of your stone – put the side you want to see facing down on the sticky paper.
When the design is complete then mix the mortar according the package directions. The consistence should be like mayonnaise. Apply a layer of petroleum jelly inside the form. If you do not do this, you will not get your stone out. Pour the mortar into the form – about 1 ½ inches. (The larger the form – the thicker the mortar). Place sticky shelf liner with glass attached down on the mortar. The sticky paper will release with time.
Before moving, let set for 24 hours – otherwise you may crack your stone. After 24 hours you can wash the glass with water and a tooth brush to remove the slurry. Let sit about 36 hours before removing from the form and about 2 weeks before putting in the ground. After a week wash the whole thing down with dish soap and water.
Planting – Seeds, Annuals and Perennials
Posted in Gardening, Uncategorized, tagged Gardening, Plants on May 26, 2010|
This year for the first time, I am holding off putting plants in the ground, or even pots, until after May 27, 2010 – that’s the full moon. I have lost so many plants over the years that I have decided to wait a little longer. My mother always planted after this time, and she had a pretty good looking garden. I was so tempted to plant flowers on May long weekend but instead I planted a few seeds in pots. I planted nasturtiums, marigolds, black penny, cilantro, scarlet runner and a few other annual seeds. Nasturtium and marigolds last well into the fall when other annuals have died off – so I always plant a few pots of these and just tuck them away until they are ready to be displayed. I also dug up a few perennials to put in pots. This is not something that I have done a lot of, but I’ve seen many perennials in pots in gardening magazines so I decided to give it a try. Last year, I put Autumn Joy Sedum in a pot on my front porch and it looked great. Well that is what I am up to in the gardening world, what about you. Have a great day, Linda
Planning your Flower/Shrub Garden – Notebook
Posted in DIY, Gardening, Helpful Hints & Tips, Reading and Books, The Home, Uncategorized, tagged Gardening, Journal, Organize on April 16, 2010| 2 Comments »
Are you interested in flower gardening and do not know where to begin? Well, I was where you are and a gardening notebook is what gave me the most momentum. I still use it today.
Several years ago, my husband and I took a landscape course and by the end of it we had a 10 year plan for our yard. This has come together quite nicely. As for the flower/shrub gardening, I was a little overwhelmed by placement, height, color, tolerance, perennial, annual….. Then I came across a good gardening book specifically for my area. What I liked about the book was a chapter about recording information and ideas in a notebook. I started my notebook some time ago, and although it is in pretty rough shape I can not replace it. It is just a simple school type book. My husband gave me a store bought gardening journal, but I have not used it yet. Using a notebook keeps me organized and helps to bring my ideas to fruition. When I get an idea, I write it down within the category of spring, summer or fall. My ideas come to me all year – therefore I keep track of them in my notebook. I also record information like: new plants; placements; successes; and failures. I record information specific to a plant like a rose bush; lily; or iris. I diarize when to plant seeds such as sweet peas & marigolds. I even take photos on occasion.
I enjoy attending the yearly garden show in my area in early spring. This event is so inexpensive and has tremendous value. Workshops run all day for the one fee of 12.00. My husband and I love to spend the entire day at the show. He helps me by taking notes- when I poke him. After the show, I rewrite the notes into my garden notebook. If you are able, attend a garden show put on by your local horticultural society.
Over time, you will gain gardening knowledge from: other gardeners; books; websites; magazines; shows; trial and error. Begin taking baby steps today – start a gardening notebook.
Take snapshots and write notes
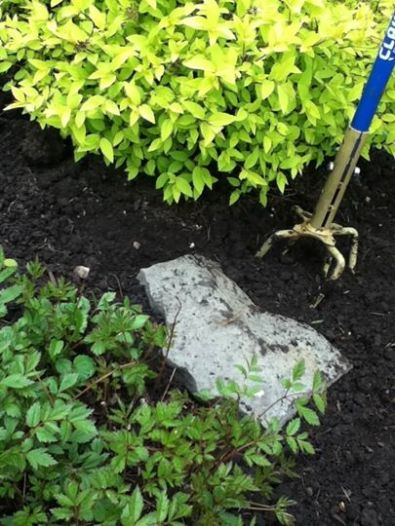
Keeping track of where you plant will help when things start popping up
Spring and Fall Log & Mid – Season Evaluation
Your drawings may look like this when it is a cold fall day and you are moving stuff around.
2009 Notes from various sources
You may like this type of Journal
This is one of the many pages inside
Ladies, I hope I have inspired you today to get gardening. Have a great week. Linda
Not Your Grandmothers Gardening Apron
Posted in DIY, Gardening, Reduce, Reuse, Recycle, Uncategorized, tagged apron, Gardening, Storage, tools on April 3, 2010|
Ladies, when I saw this gardening apron in the book You Grow Girl, I thought I would give it a try. I enjoyed searching for the fabric – the selections are endless. I picked up the decorative fabric (a printed tablecloth) in a thrift store for 1.00. I also picked up ‘burlap like’ fabric for the lining – another 1.00. I was able to make four aprons – 1 for myself and 3 for gifts. I used different ties on each as you can see in the photos. (For the decorative fabric you could use retro fabric with big bold prints).
Here is how I made the gardening apron:
Cut 2 pieces of fabric 16” X 20” each. One of decorative fabric and one of lining fabric.
Sew the two pieces right side together. (I used a small zig zag in order not to seam finish).
Leave a small opening to turn to right side. Trim corners.
Turn to right side. Press. (Make sure corners are square – not rounded)
Stitch ¼ “ along top edge (20” side).
Fold right side up over lining and leave about 2 “of lining showing at the top. Press.
Sew sides together 1/4 “seam. Press. (You have formed a big pocket)
Mark 2 – 5” pockets and 2 – 3 ½ pockets – or wherever dimensions you prefer.
Sew these down to form individual pockets.
Sew about 2 yards (I used 1 ½ meters) of ribbon (or make from decorative fabric) on top edge to make the tie. Press.
Why not give this a try. It is fun, quick and easy. Use your creativity. Linda
Two of the aprons are made completely from reused materials. With the other two aprons, I bought the tie material as I was not able to find ties at the time.